How to signup for WhatsApp Cloud API? Here is a guide !
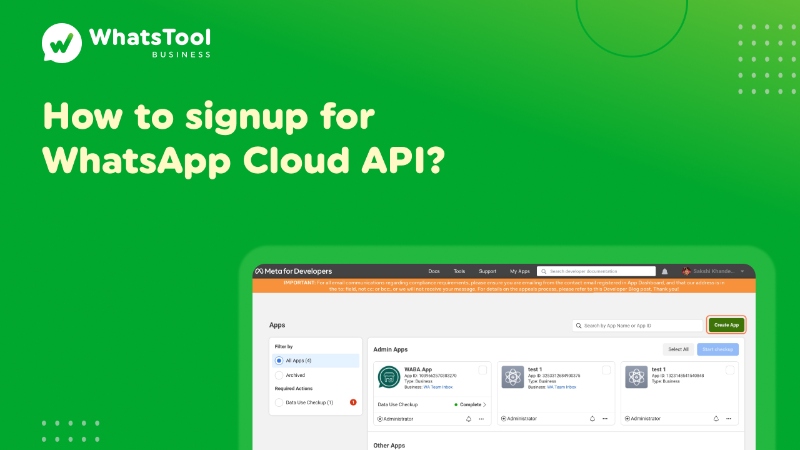
1. Go to All Apps – Facebook for Developers
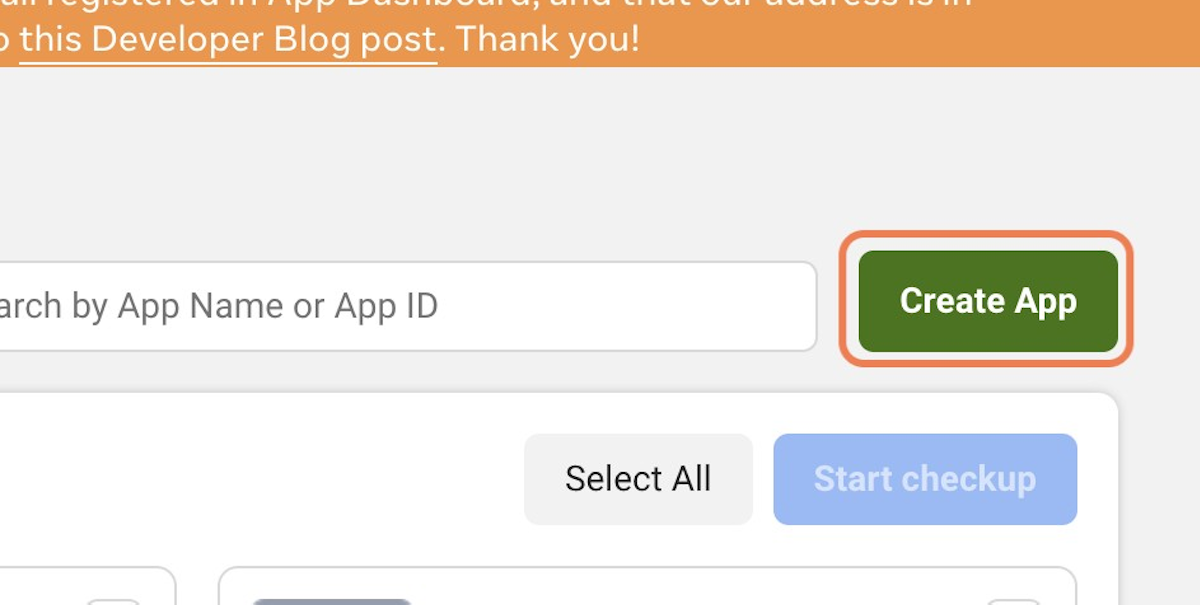
2. Click on Create App
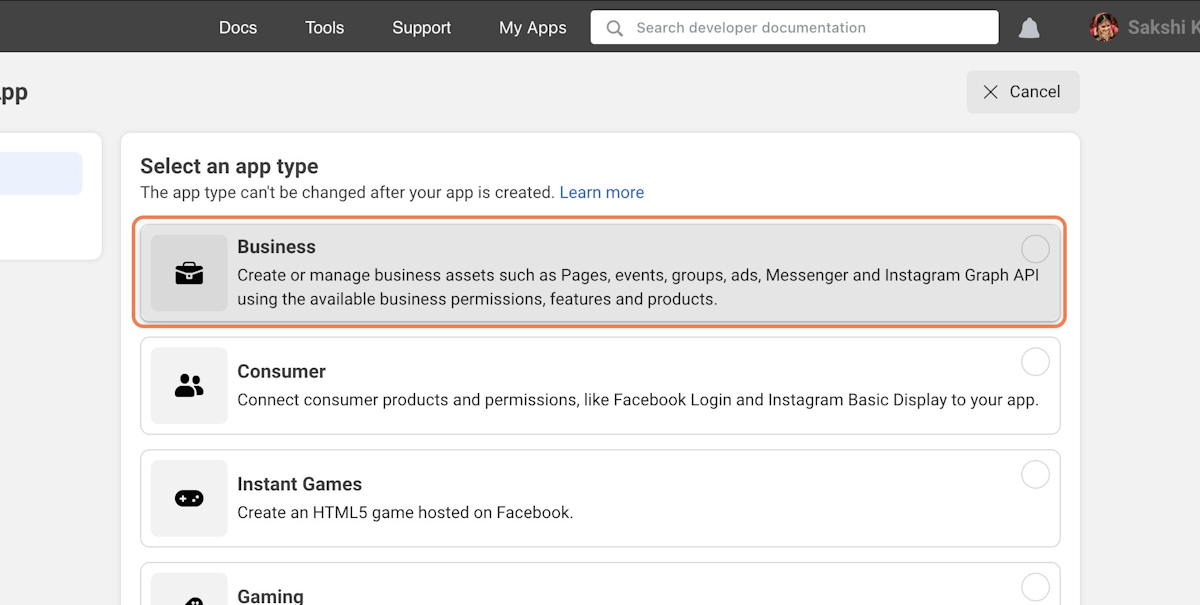
3. Click on Business
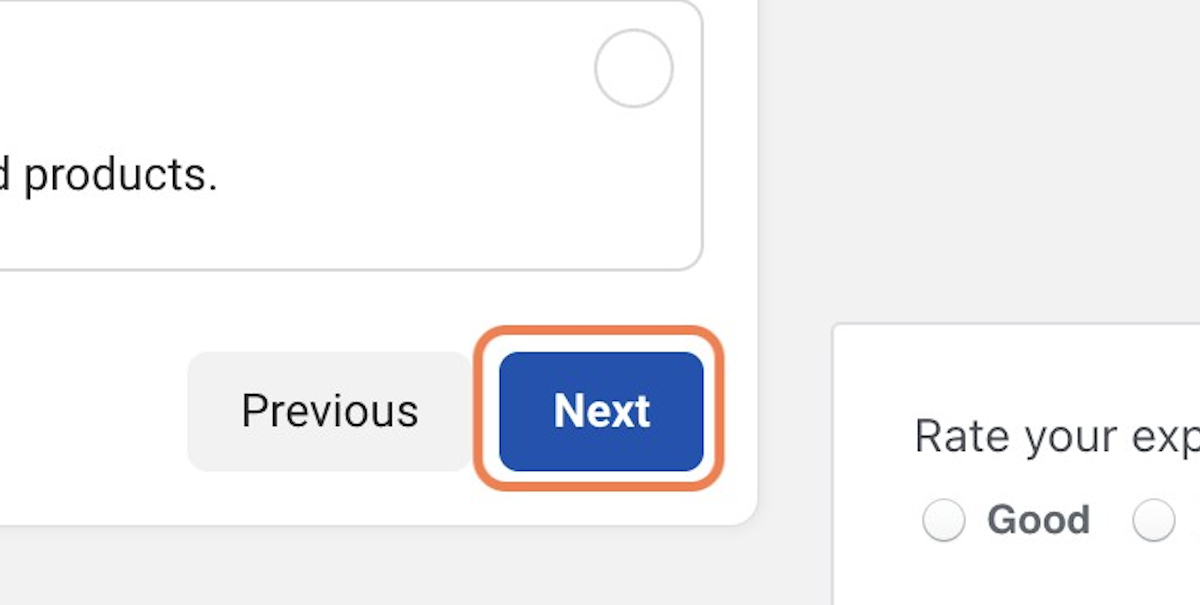
4. Click on Next
5. Type “App Name”
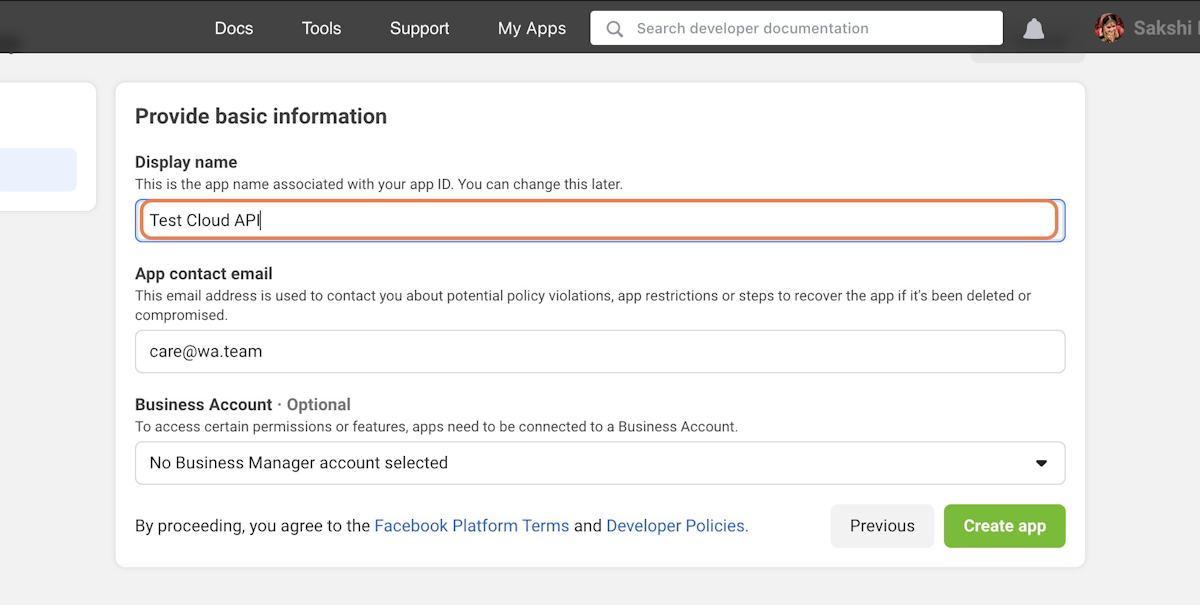
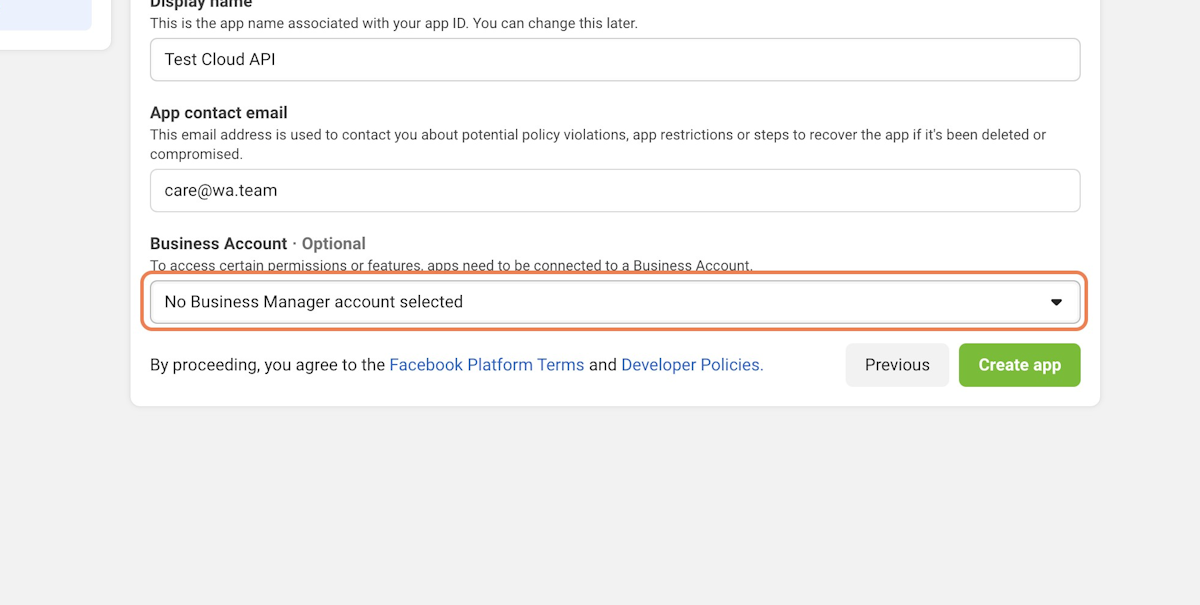
6. Select A Business Account
7. Click on Create app

8. Scroll Down To Webhooks & WhatsApp
First Let’s Add The Webhook Product
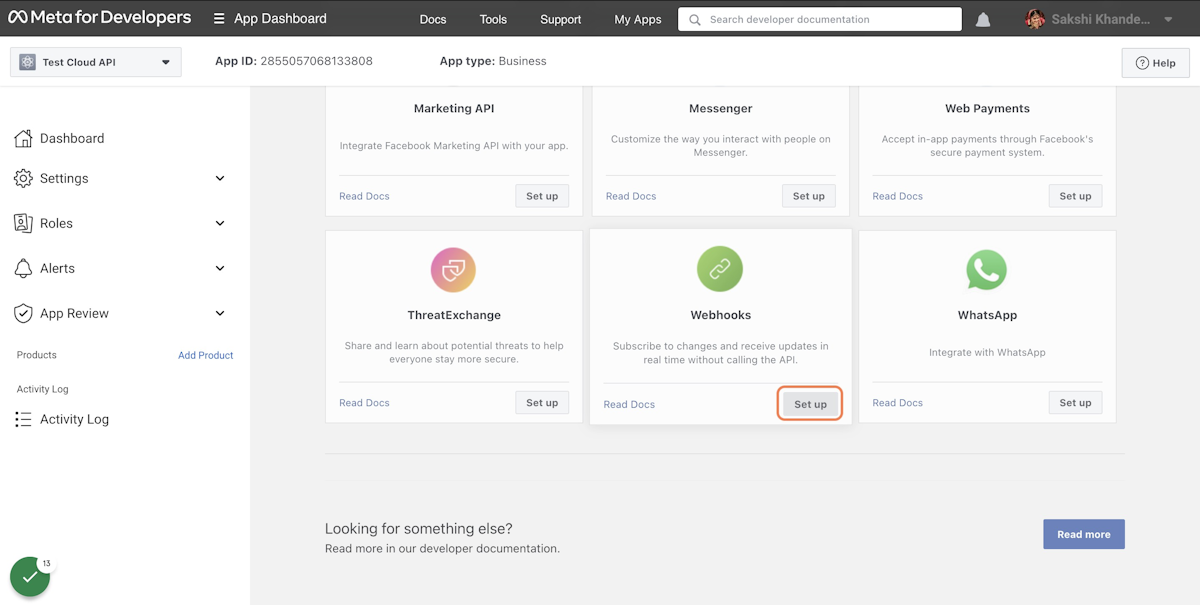
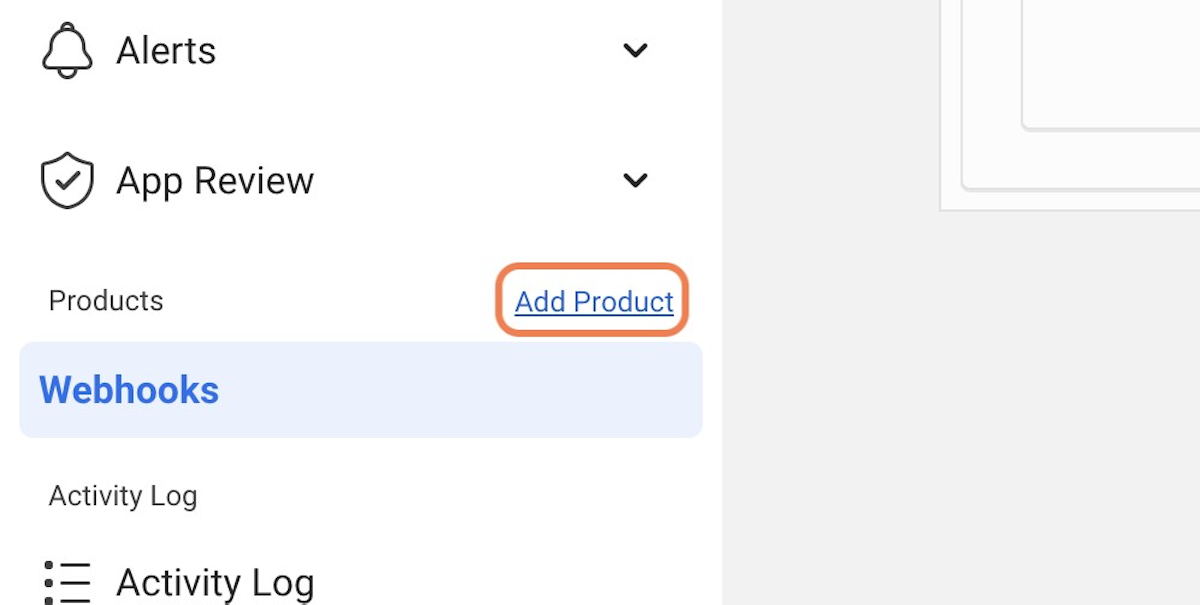
9. Click on Add Product
10. Now Let’s add WhatsApp Product
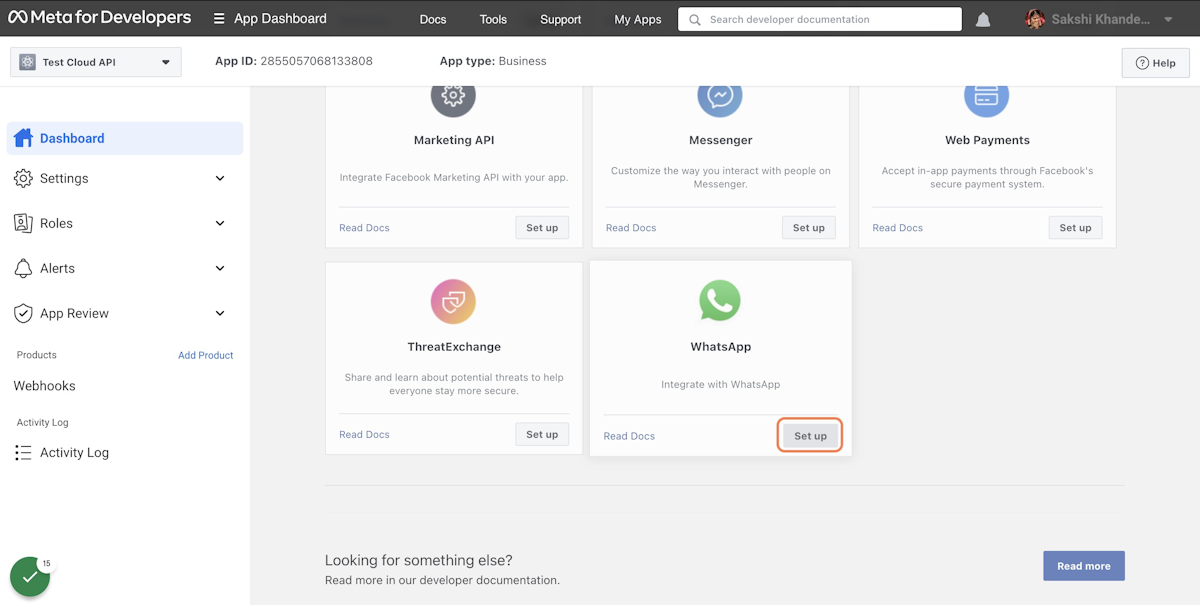
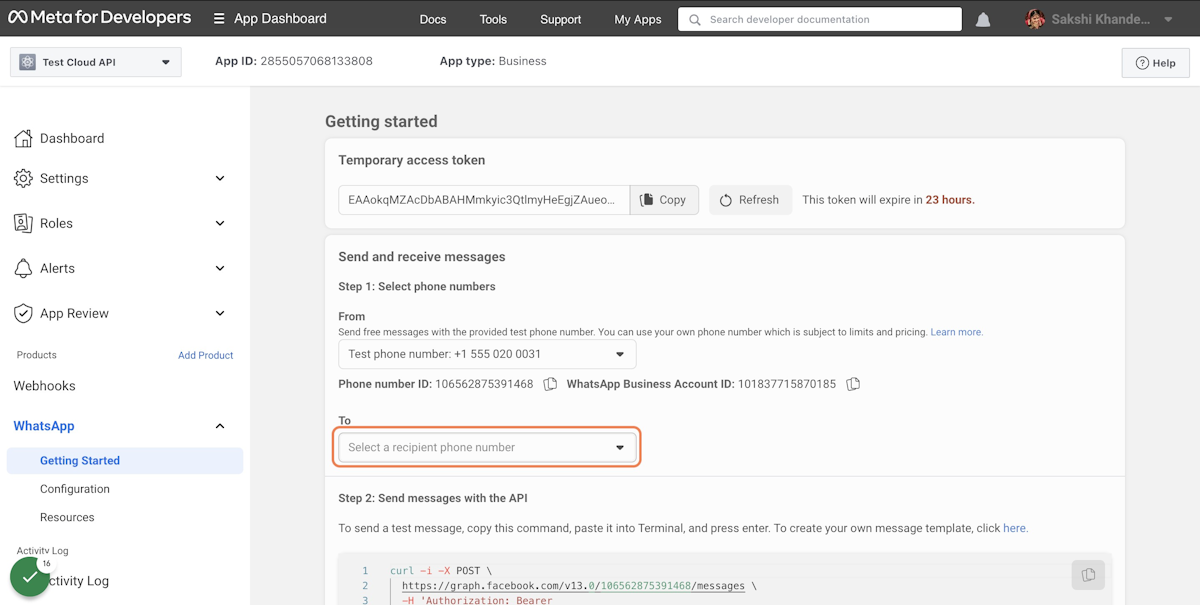
11. Cloud API is LIVE with Test Number
You can test the API & Integration Using the Test Credentials Or Also Proceed with Adding Your Own Number
Read Other Blogs - view